Adding your first camera to Frigate
This guide walks through connecting a camera to Frigate on your Argus NVR so live view works and recordings start. If you've completed your network setup and Frigate is running, this is the next step.
Argus systems ship with Amcrest cameras already prepared for local NVR use: DHCP is enabled, RTSP is on, and a default password is set. If you upgraded to Ubiquiti cameras, see the Ubiquiti cameras section below — that hardware uses a different setup flow. This guide covers Amcrest first, then Ubiquiti.
Before you start
This guide assumes:
- Frigate is running and you can open its web interface at
https://frigate.internalor your NVR's IP on port 5000 - Your camera VLAN and firewall rules are in place if you're using network segmentation. See Setting up a camera VLAN in OPNsense if not
- The camera is powered on and connected to the correct switch port
Throughout this guide, example IP addresses are used for clarity. Replace them with the addresses from your own network:
- NVR (main LAN):
192.168.1.100 - Router / OPNsense (main LAN):
192.168.1.1 - Cameras (camera VLAN):
192.168.10.101,192.168.10.102, and so on - Your computer (main LAN):
192.168.1.50when you need temporary access to the camera VLAN
If Frigate itself won't load, see Can't reach a service by hostname or What to do when a container won't start first.
Running your own hardware?
If you did not purchase an Argus system from LAN Foundry, this guide still applies, but you're responsible for initial camera setup yourself. Before Frigate can connect, you need to reach each camera directly to:
- Assign or confirm network settings (DHCP or static IP)
- Enable RTSP if the manufacturer disables it by default
- Set credentials the NVR will use in stream URLs
That usually means browsing to the camera's web interface or using the manufacturer's mobile app while the camera is on a network your computer can reach. If your cameras will live on an isolated VLAN, plan for that access during initial setup. See Accessing cameras from your computer for the temporary firewall rule approach on OPNsense.
What LAN Foundry configures before shipping
On Argus systems, cameras are prepared so this guide can focus on Frigate rather than factory defaults:
| Setting | Amcrest (included) | Ubiquiti (upgrade) |
|---|---|---|
| DHCP | Enabled | Enabled |
| RTSP | Enabled | Enabled |
| Login | Username admin, default password set at the factory |
See Ubiquiti cameras section below |
| Cloud / phone-home | Disabled or minimized where the camera allows | Configured for local use |
Your Argus welcome materials include the camera password for Amcrest systems. We do not publish default passwords in this documentation. If you changed the password after receiving the system, use your current password when adding the camera to Frigate.
Step 1 — Connect the camera and find its IP address
- Connect the camera to a switch port assigned to your camera VLAN (or your main LAN if you're not using a VLAN yet).
- Power the camera on and wait for it to boot. PoE cameras may take a minute.
- Confirm the camera received an IP address from DHCP.
In OPNsense, open Services, then DHCPv4, then Leases. Select your camera VLAN interface and look for a new lease matching the camera's MAC address. Note the IP address — you'll enter it in Frigate in the next step.
If no lease appears, check cabling, switch VLAN assignment, and PoE before proceeding. See Camera feed not showing in Frigate if the camera never gets an address.
Step 2 — Optional camera settings
These steps are optional on a stock Argus system but recommended for many households.
Change the default password (recommended)
The factory password is fine for initial setup, but anyone who can reach your camera VLAN could pull the RTSP stream if they know it. Changing the camera password is a good idea once Frigate is working.
Open the camera's web interface from a computer on your main LAN. If cameras are on an isolated VLAN, add the temporary OPNsense rule described in Accessing cameras from your computer. Log in with username admin and the password from your Argus welcome materials, then change the password in the camera settings.
After changing the password, use the new password when Frigate asks for credentials in Step 3.
Adjust on-camera overlays (OSD)
Date, time, and label text burned into the video are configured in the camera's own settings, not in Frigate. In the camera web interface, look under display or OSD settings. Position and enable/disable overlays to taste. Changes appear in the recorded pixels — Frigate does not add or remove these overlays for you.
Step 3 — Add the camera in Frigate
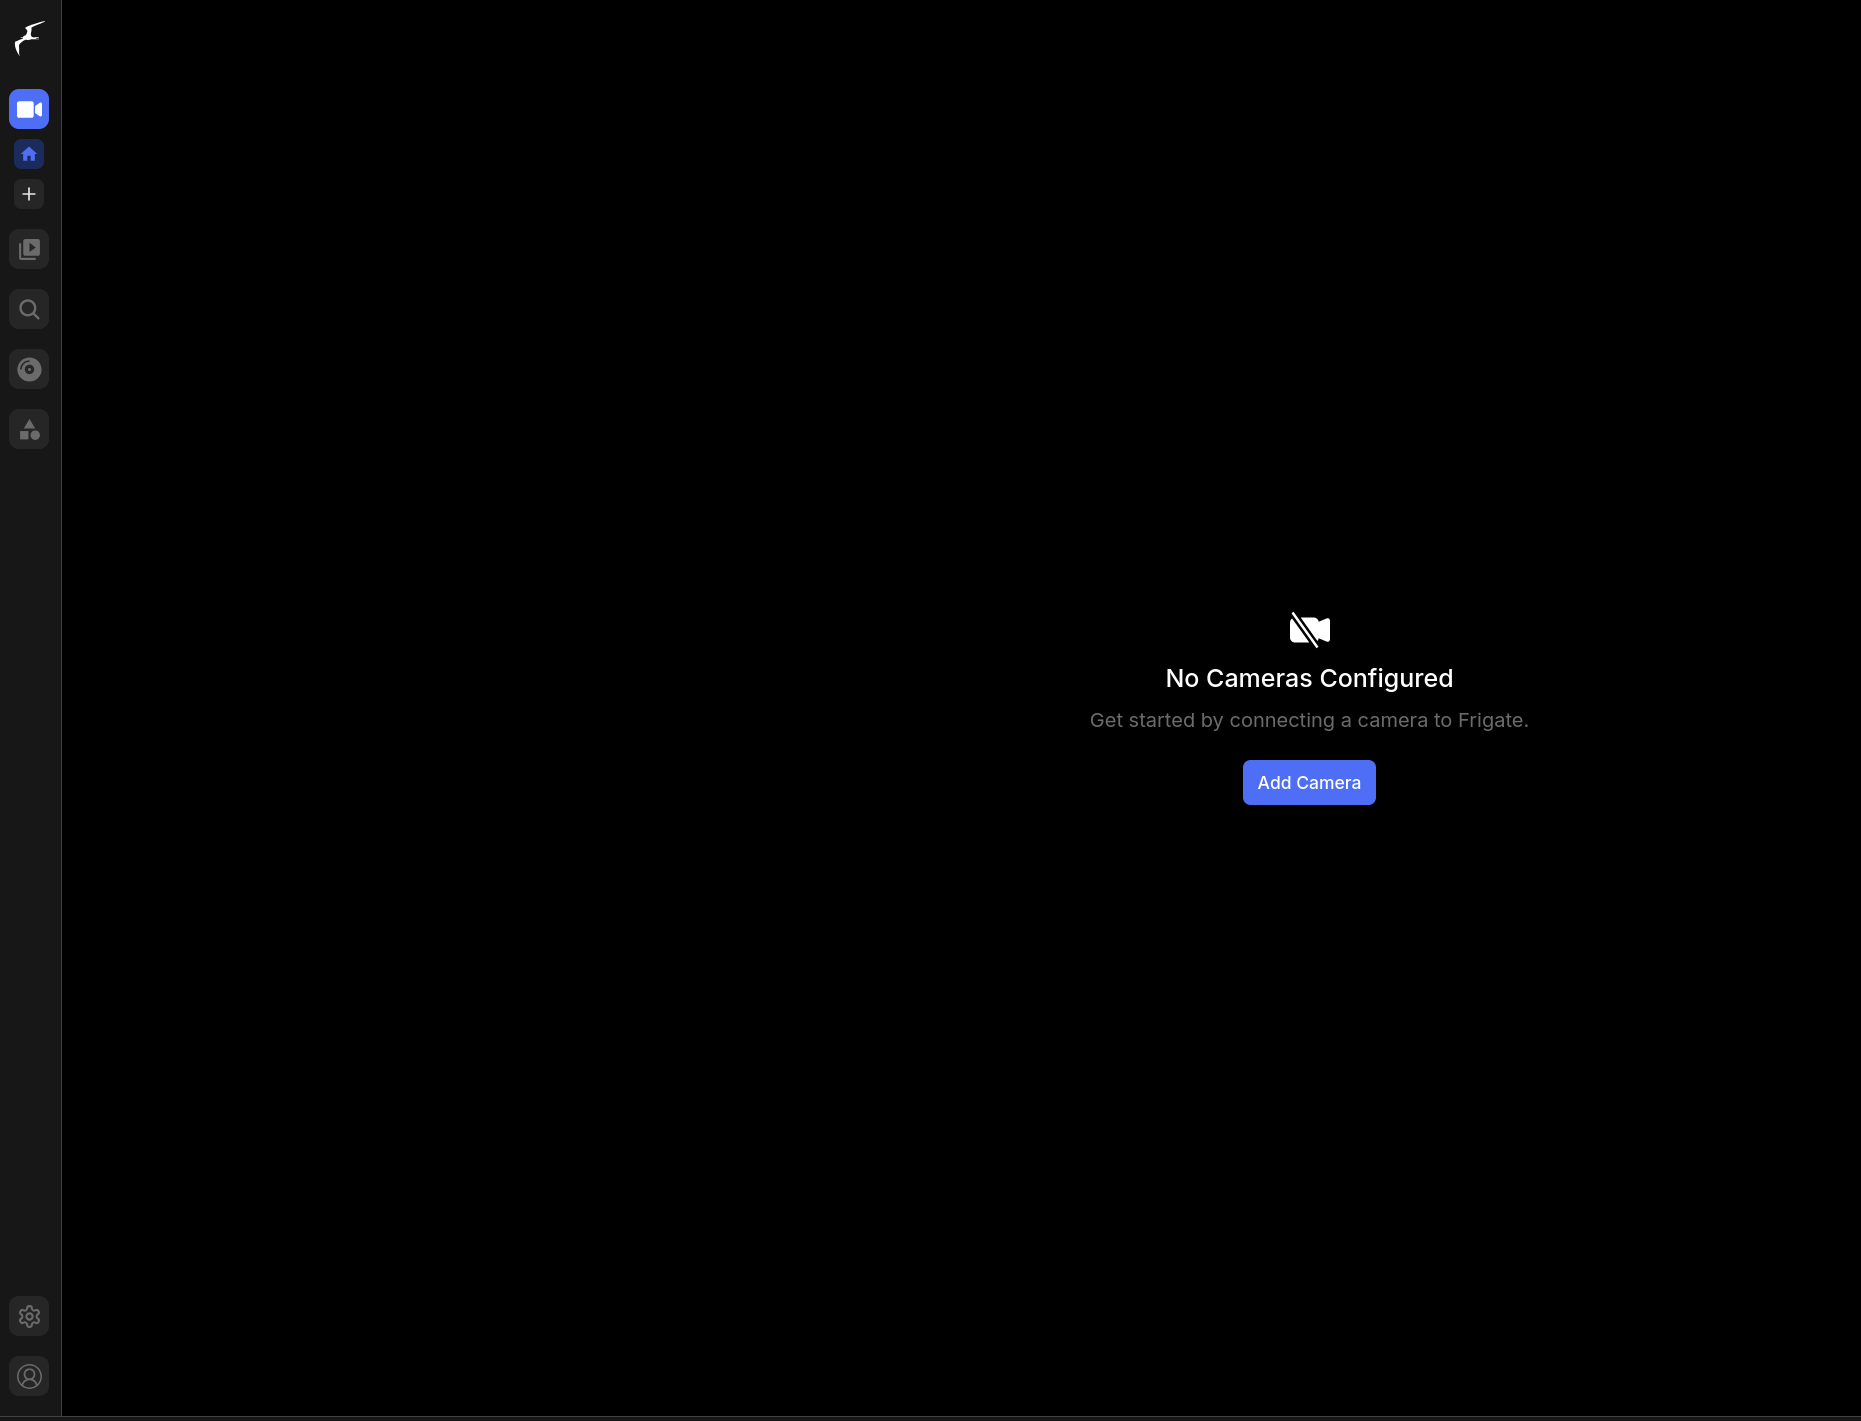
Frigate's camera wizard takes a name, IP address, and credentials and handles stream configuration from there. Open the Frigate web interface — if no cameras have been added yet it will look like this:
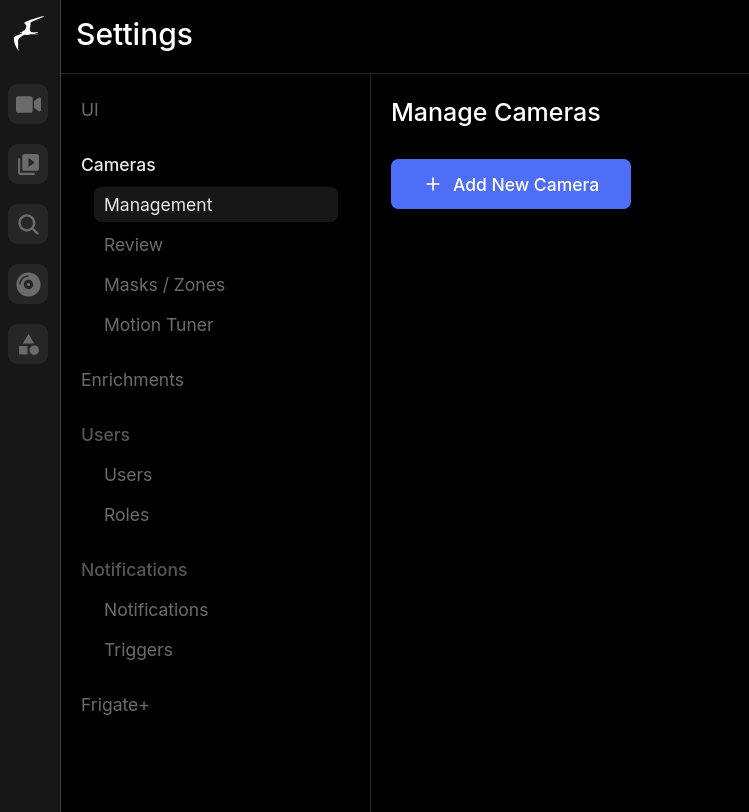
Navigate to Settings → Cameras → Management and click Add new camera.
Amcrest Cameras
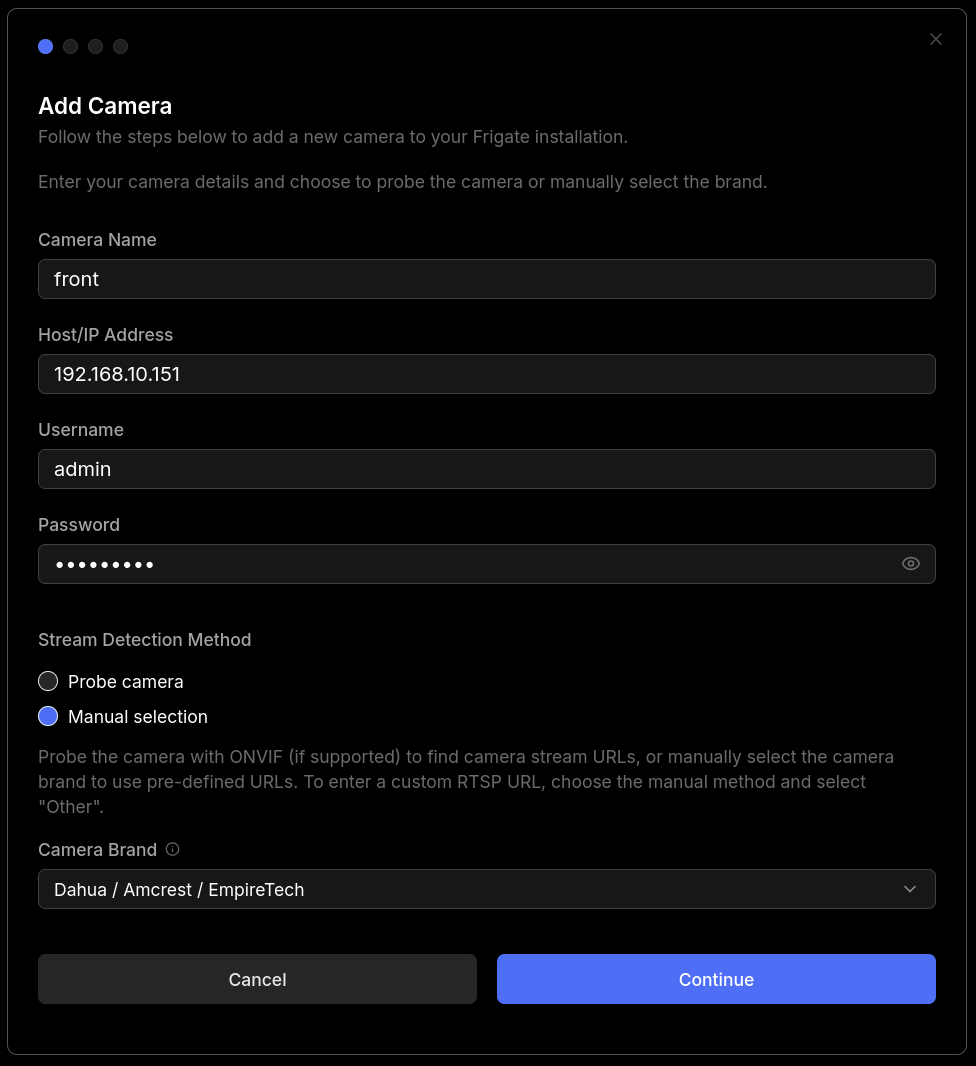
Fill in the camera details:
- Camera name — a short label you'll see in the Frigate UI, such as
front_doorordriveway. Letters, numbers, and underscores only. - IP address — the address you noted from the DHCP leases in Step 1.
- Username —
admin - Password — the password from your Argus welcome materials (or your updated password if you changed it in Step 2).
- Brand — select Amcrest.
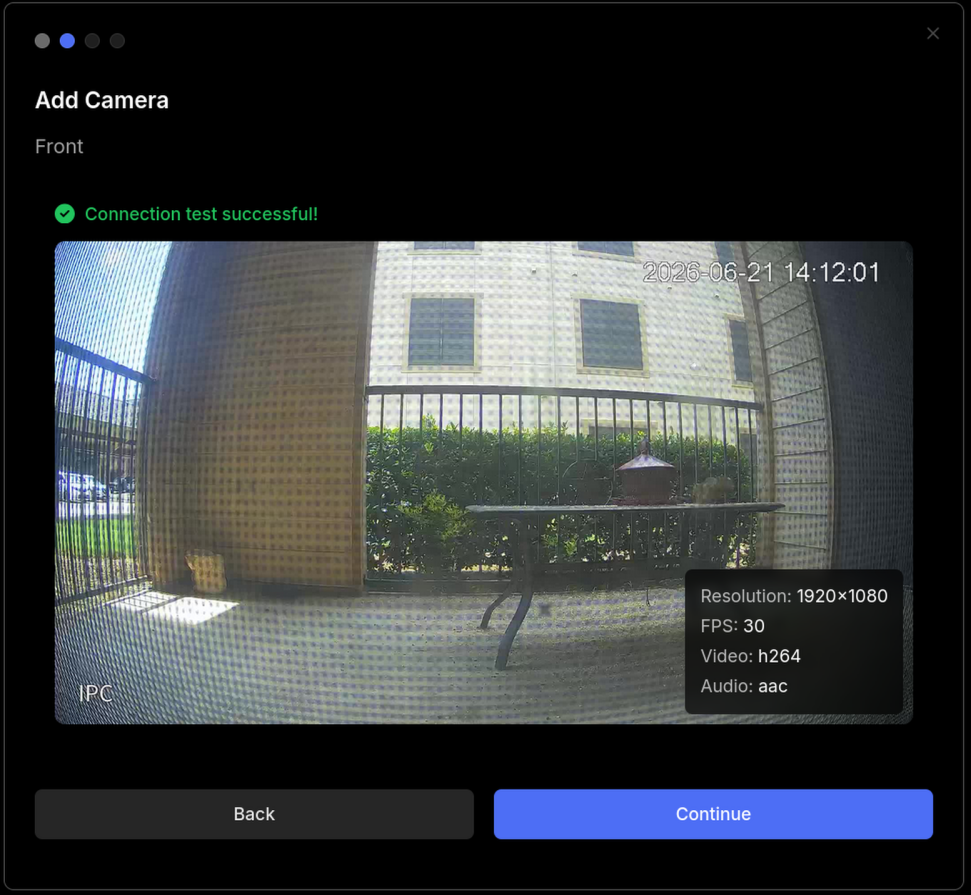
Click Continue. Frigate will connect to the camera and display a stream preview with stats. Confirm the image looks correct, then click Continue again.
On the roles screen, assign streams to their roles:
- Set the lower-resolution stream to Detect — this is what Frigate runs object detection on.
- Set the higher-resolution stream to Record — this is what gets written to the recording pool.
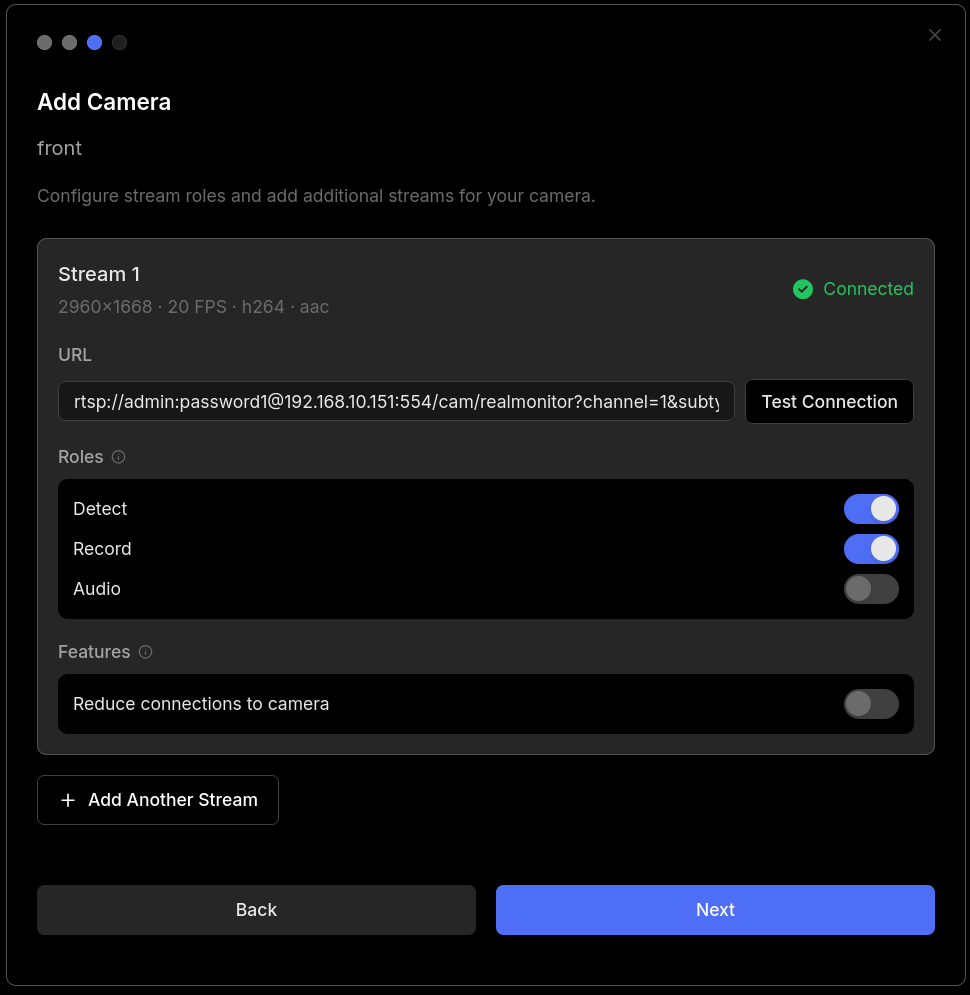
If the camera only exposes one stream, assign both Detect and Record to it. Detection and recording will run from the same feed.
Click Next. The validation screen confirms Frigate can reach all assigned streams.
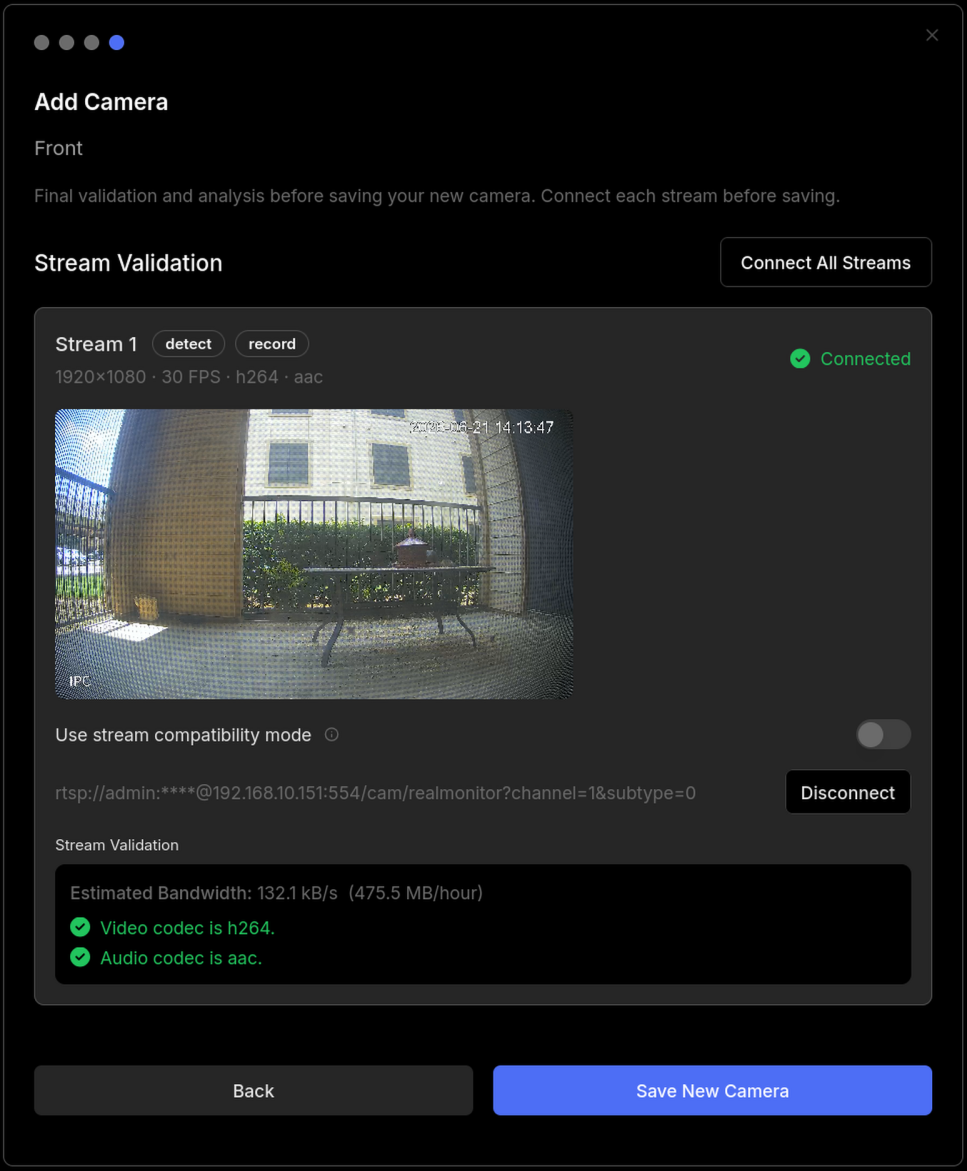
Click Save new camera.
Ubiquiti cameras
If you upgraded to Ubiquiti cameras, see the Ubiquiti cameras section below. The setup flow differs from Amcrest.
Step 4 — Confirm the feed
After saving, return to the Frigate home page. Your camera tile should appear with a live image within a minute.
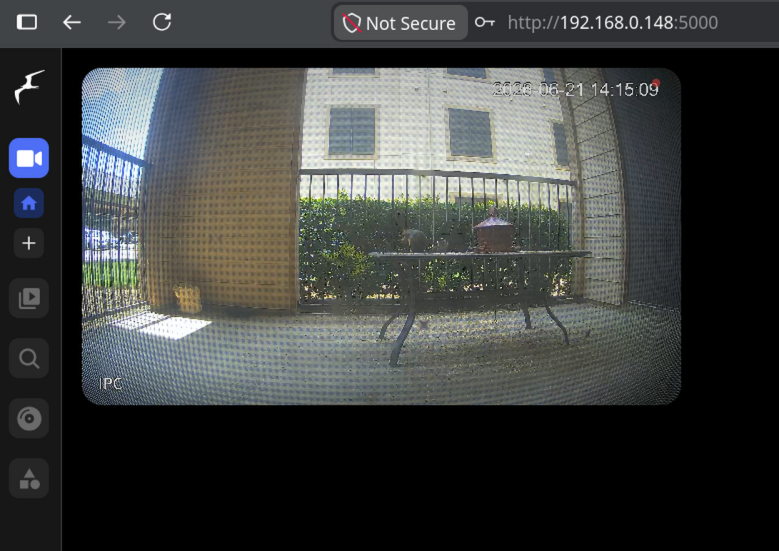
If the tile stays blank or shows an error, see Camera feed not showing in Frigate. The logs usually point to credentials, stream URL, or network access.
Adding another camera
Repeat the wizard for each additional camera:
- Note the new camera's DHCP address from OPNsense.
- Go to Settings → Cameras → Management and click Add new camera.
- Enter the new camera's name, IP, credentials, and brand.
- Assign roles and save.
Each camera on your VLAN gets its own IP and its own entry in Frigate with a unique name.
What normal looks like
When everything is working:
- The camera tile in Frigate updates smoothly with a few seconds of delay at most
- Recordings and events accumulate on the timeline
docker logs frigatedoes not spam connection errors for that camera
Some buffering right after a restart is normal. Persistent "Unable to connect" messages are not.
Advanced: editing config.yml directly
If you prefer to manage Frigate's camera configuration as a file — for version control, bulk changes, or scripting — you can edit config.yml instead of using the wizard. Changes made in the GUI are reflected in the file and vice versa.
On a standard Docker install, config.yml lives on the NVR host in the directory mounted into the container at /config. If you're unsure of the path:
docker inspect frigate --format '{{ range .Mounts }}{{ if eq .Destination "/config" }}{{ .Source }}{{ end }}{{ end }}'
Open config.yml in that folder with a text editor. YAML is indentation-sensitive. Use spaces, not tabs, and align nested lines exactly as in the examples below.
Building RTSP stream URLs
Frigate needs an RTSP URL for each stream. The format depends on the camera brand.
Amcrest main stream (higher resolution — use for recording):
Amcrest sub stream (lower resolution — use for detection):
Replace YOUR_PASSWORD and the IP address with your values.
Ubiquiti cameras use token-based authentication instead of a username/password in the URL. See the Ubiquiti cameras section below for stream URL format and config.yml examples.
Test a stream URL before editing Frigate
From the NVR over SSH:
ffprobe -rtsp_transport tcp "rtsp://admin:YOUR_PASSWORD@192.168.10.101:554/cam/realmonitor?channel=1&subtype=0"
If ffprobe returns codec information, the stream is reachable. If it fails, fix the URL or network path before editing config.yml. See Camera feed not showing in Frigate.
Roles in config.yml
Each RTSP input is tagged with one or more roles:
| Role | What it does |
|---|---|
detect |
Object detection, events, and alerts |
record |
Continuous video written to the recording pool |
A single stream can carry both roles if you prefer a simpler config. The recommended split is sub stream for detect and main stream for record — detection workload scales with resolution and frame rate.
| Layout | When it makes sense |
|---|---|
Sub stream for detect, main for record |
Default for Argus. Best balance for most setups |
One stream with both detect and record |
Simplest config. Fine for a small camera count |
| Sub stream for both roles | Lower storage and CPU use. Recordings are not full resolution |
Example: Amcrest camera
cameras:
  front_door:
    ffmpeg:
      inputs:
        - path: rtsp://admin:YOUR_PASSWORD@192.168.10.101:554/cam/realmonitor?channel=1&subtype=1
          roles:
            - detect
        - path: rtsp://admin:YOUR_PASSWORD@192.168.10.101:554/cam/realmonitor?channel=1&subtype=0
          roles:
            - record
    detect:
      width: 1280
      height: 720
      fps: 5
Replace front_door with a short name and update the password and IP address.
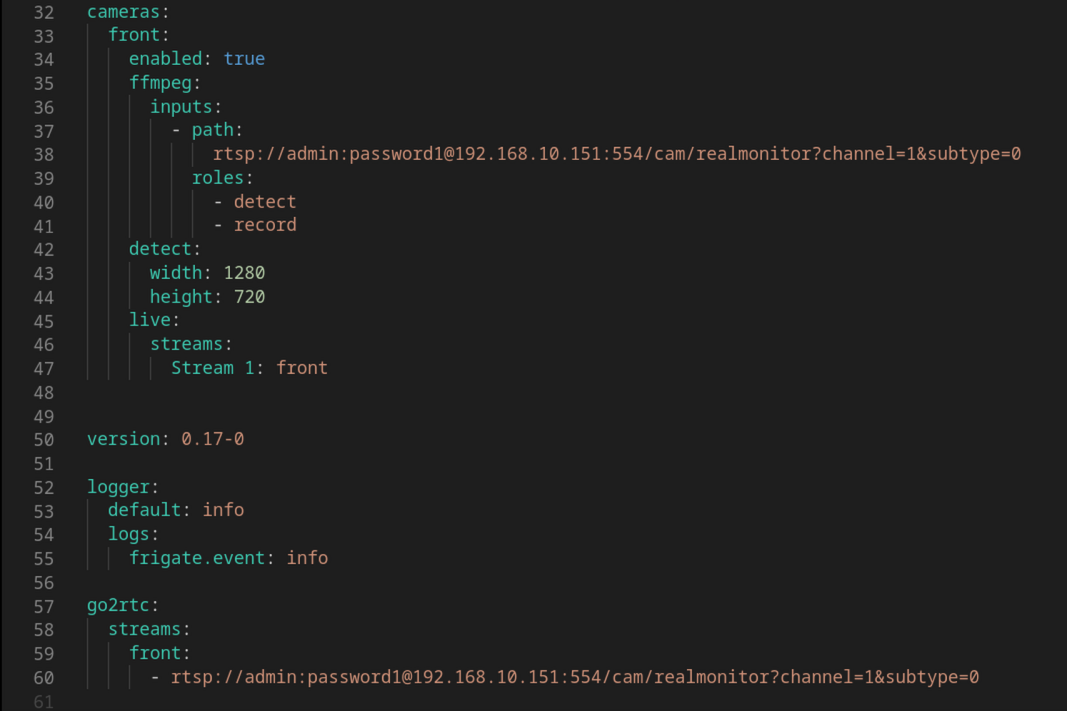
Apply the configuration
Restart Frigate to load the updated config:
If Frigate fails to start, check the logs for YAML errors:
See What to do when a container won't start if the container won't stay running.
Where to go from here
- Setting up recording zones and motion detection, once feeds are stable
- Placing cameras on the camera VLAN, when adding more cameras
- Tested camera list, for RTSP notes on additional models
- Tuning motion sensitivity to reduce false alerts, after detection is running
- Camera feed not showing in Frigate, if a feed stops working later
Was this page helpful?
Found something wrong or out of date? Let us know below, or open a GitHub issue if you have a GitHub account.